Tuesday, January 26, 2010

Baked Couscous with Tomato and Spinach Pesto-Thanks Carrie!

My wonderful sister-in-law, Carrie, gave me this recipe and it was delicious! I think I took the idea of "Pesto" to heart and used my food processor so you may not have to chop it that much, but it was still delicious. This is one of those meals that makes you feel good after eating it. You feel full, but a good full! It is super easy to make too! The picture doesn't look appetizing, but I promise it tastes good! I only used 4 roma tomatoes because that is all we had on hand....Enjoy!


Baked couscous with tomato and spinach pesto
10 roma tomatoes, halved
2 tablespoons thyme leaves
2 tbspns olive oil
sea salt and cracked black pepper
1.5 cups couscous (I cooked it in the chicken stock)
1.5 cups chicken stock

Spinach Pesto
1.5 cups baby spinach leaves, roughly chopped
1/2 cup toasted pine nuts
1/2 cup finely grated parmesan cheese
2 tbspns lemon juice
1/2 cup olive oil
sea salt/cracked black pepper

Preheat oven to 400 F. For the spinach pesto, place the spinach, pine nuts, parmesan, lemon juice, oil, S&P in a bowl and mix to combine. Set aside. Place the tomatoes, thyme, oil, S&P in a baking dish and toss to combine. Roast for 20 minutes. Add the couscous and pour over the stock. Cover with foil and cook for a further 10 minutes. Top with spinach pesto to serve. Serves 4.

Strawberry Shortcake...Cook-A-Doodle-Doo!

My class is currently reading a story called, "Cook-A-Doodle-Doo," a story about a rooster who wants to learn how to cook so he follows his grandmother's recipe for Strawberry Shortcake. In order to make this story even more fun, I am surprising my class tomorrow and bringing in Strawberry Shortcake, compliments of the Pioneer Woman. I will take pictures tomorrow at school and let you know what they thought of it. It is killing me not to try some tonight, our house smells delicious! UPDATE....they loved it, I have never seen them inhale their snack like they did today. I finally got to taste it for myself today, it is a winner! Delicious!


Strawberry Shortcake Cake
Ingredients
Cake
1-½ cup Flour
3 Tablespoons Corn Starch
½ teaspoons Salt
1 teaspoon Baking Soda
9 Tablespoons Unsalted Butter, Softened
1-½ cup Sugar
3 whole Large Eggs
½ cups Sour Cream, Room Temperature
1 teaspoon Vanilla

Icing
½ pounds Cream Cheese, Room Temperature
2 sticks Unsalted Butter
1-½ pound Powdered Sugar, Sifted
1 teaspoon Vanilla
1 pound Strawberries


Preparation Instructions
IMPORTANT: Be sure to use a cake pan that’s at least 2 inches deep! Before baking, the batter should not fill the pan more than halfway.

1. Sift together flour, salt, baking soda, and corn starch.

2. Cream 9 tablespoons butter with the sugar until light and fluffy. Add eggs one at a time, mixing well each time. Add sour cream and vanilla and mix until combined. Add sifted dry ingredients and mix on low speed until just barely combined.

3. Pour into greased and floured 8-inch cake pan. Bake at 350 degrees for 45 to 50 minutes, or until no longer jiggly. Remove from cake pan as soon as you pull it out of the oven, and place on a cooling rack and allow it to cool completely.

4. Stem strawberries and slice them in half from bottom to top. Place into a bowl and sprinkle with 3 tablespoons sugar. Stir together and let sit for 30 minutes. After 30 minutes, mash the strawberries in two batches. Sprinkle each half with 1 tablespoon sugar and allow to sit for another 30 minutes.

5. Make icing: combine cream cheese, 2 sticks butter, sifted powdered sugar, vanilla, and dash of salt in a mixing bowl. Mix until very light and fluffy.

6. Slice cake in half through the middle. Spread strawberries evenly over each half (cut side up), pouring on all the juices. Place cake halves into the freezer for five minutes, just to make icing easier.

7.Remove from freezer. Use a little less than 1/3 of the icing to spread over the top of the strawberries on the bottom layer. Place the second layer on top. Add half of the remaining icing to the top spreading evenly, then spread the remaining 1/3 cup around the sides.

Leave plain OR garnish with strawberry halves.

IMPORTANT: Cake is best when served slightly cool. The butter content in the icing will cause it to soften at room temperature. For best results, store in the fridge!

Monday, January 25, 2010

Thai Chicken Flatbread Pizza

This is my favorite pizza of all time! My picture doesn't look as appetizing as it is, but I also didn't include all of the ingredients this time. I normally put peanuts, bean sprouts, and cilantro on top, but didn't get to the grocery store. However, I included the picture of mine and what it normally looks like so you know what to expect. I highly recommend this, if you are looking for Rachel Ray's recipe for more details and measurements, click here.    I normally just eyeball it on how much I need, especially since I use flatbread instead of regular pizza dough.


Loosely Adapted from Rachel Ray's Thai Chicken Pizza Recipe
1 Flatbread pizza dough (Rachel uses pizza dough)
Plum sauce
Red Pepper Flakes
provolone cheese
chicken breast
peanut butter
soy sauce
peanuts
bean sprouts
red pepper
1/4 seedless cucumber, peeled and cut into matchsticks
2 Tb. honey
2 Tb. apple cider vinegar
peanuts
Cilantro (for garnish)

1. Spread the plum sauce on the flatbread or pizza dough, sprinkle with red pepper flakes, cheese, and red pepper. Bake until the cheese has melted.
2. Meanwhile, cut the chicken up into small pieces about 1/2 inch. Once they are cooked, add some peanut butter and soy sauce to cover the chicken.
3. Cut up the cucumber into matchsticks and place in a dish with honey and apple cider vinegar. Let it marinade for at least 10 or more minutes.
4. Once the pizza is done, put the chicken, cucumbers (without sauce), bean sprouts, peanuts, and cilantro on top. Serve warm and enjoy!

Sunday, January 24, 2010

Oatmeal Peanut Butter Chocolate Chip Cookies!

I was in the mood to bake today, so I went to my new favorite website, Tasty Kitchen and searched the cookies section. I was looking for a recipe that called for ingredients we had on hand. Our friend Mary is watching our dog Stella for us when we go to my cousin's wedding, so we figured we'd bribe her with some tasty treats to show her our appreciation for watching our energetic puppy. I have to admit, we ran out of chocolate chips from the muffins I made, so I used half chocolate chips and half white chocolate chips, but I think it made them even better!  


Tip: Do not melt your butter to soften it, otherwise your cookie dough won't stick together and your cookies will fall apart when you eat them. I made this mistake, I put it in the microwave and started getting the other ingredients ready and let it get too soft. They turned out just fine, but are much more chunky than normal cookies. Just let your butter get to room temperature.

Ingredients

  • ½ cups Butter, At Room Temperature
  • ½ cups White Sugar
  • ¾ cups Packed Light Brown Sugar
  • ½ cups Creamy Peanut Butter
  • 1 whole Egg
  • 1 teaspoon Vanilla
  • ¾ cups All-purpose Flour
  • ⅛ teaspoons Salt
  • ½ teaspoons Baking Soda
  • ½ teaspoons Baking Powder
  • ½ teaspoons Cinnamon
  • 2 cups Quick Cooking Oats
  • 1 cup Semi-Sweet Chocolate Chips

Preparation Instructions

Heat the oven to 375F and line two baking sheets with parchment paper.
In the bowl of a stand mixer, using the paddle attachment, cream the butter and both the sugars on medium-low speed until well-mixed but not light and fluffy. Add the peanut butter and mix until well-blended. Add the egg and vanilla and mix until well-combined.
In a medium bowl, combine the flour, salt, baking soda, baking powder, and cinnamon. Whisk until well-combined.
Add the dry ingredients to the bowl of the mixer and, on low speed, mix until most of the dry ingredients are combined. Add the oats and chips and mix them in on low speed, or by hand.
Scoop the cookies onto the prepared pan by rounded tablespoonfuls. Bake for 9-12 minutes, or until the cookies are lightly browned and puffed.
Cool on the pan for 3 minutes before transferring to a wire rack to cool completely.
Enjoy!

Cheeseburger Meatloaf-Yum-o Rachel Ray!

I had to make something delicious and a real "guy meal" for the Vikings game today, so I decided on our favorite, Rachel Ray's Cheeseburger Meatloaf. I normally don't love meatloaf, but this is one that I will eat, and eat again the next day for lunch. It is super easy and tastes just like a yummy cheeseburger. I normally serve it with mash potatoes with truffle oil, but we didn't have any potatoes and since we are going to be at my cousin's wedding and I didn't want to buy groceries for this week. The picture doesn't do this dish justice, but I promise it is delicious!

Ingredients:
  • 2 tablespoons extra-virgin olive oil, plus more for greasing
  • 1 red onion, finely chopped
  • 2/3 cup ketchup
  • 2/3 cup bread crumbs
  • 2 large eggs
  • 1/2 cup bread-and-butter pickles, chopped
  • 1-1/2 pounds ground beef
  • 8 ounces cheddar cheese, cut into 1/3-inch cubes
  1. Preheat the oven to 400°. Lightly oil a rimmed baking sheet. In a medium skillet, heat 2 tablespoons olive oil over medium heat. Add the onion and cook, stirring until slightly softened, about 3 minutes.
  2. In a large bowl, combine the ketchup, bread crumbs, eggs and pickles; mix in the onion. Crumble in the beef, add the cheese and mix together. Transfer to the prepared baking sheet and shape into a 4-by-12-inch loaf. Bake until an instant-read thermometer inserted into the center registers 160°, about 35 minutes. 
  3. Let the meatloaf rest for 5 minutes before slicing.

Oatmeal, Yogurt, Chocolate Chip Muffins!

On the weekend, I have gotten into the habit of making blueberry pancakes and smoothies for breakfast; however, we had that yesterday and I wanted to try something new. I wanted to make some sort of oatmeal muffin and use up ingredients that are in our fridge that we need to use before we go to my cousin's wedding this week/weekend. So I went to my trusty friend, google.com, and searched for oatmeal yogurt muffins and found a good recipe, but I made a few changes. This recipe calls for pecans, dates, and raisins, but I just used the raisins and added chocolate chips. I also used yogurt instead of sour cream and they were delicious! The best part about these muffins is that you will more than likely have all of the ingredients on hand in your pantry! I suggest you give them a try. I also used this one large muffin pan and two small 12 muffin pans to make these.


Oatmeal, Yogurt, Chocolate Chip Muffins
Adapted from Cooks.com
2 c. oatmeal 
2 c. sour cream (or plain yogurt)- I used Vanilla Yogurt
2/3 c. melted butter
4 eggs
2 c. brown sugar
2 c. flour
2 tsp. baking powder
1 tsp. baking soda
1/2 tsp. salt
1/2 cup raisins
1 cup chocolate chips

1. Combine oatmeal and yogurt (or sour cream). Stir in melted butter, then eggs and brown sugar. Mix together dry ingredients and stir in. Stir in chocolate chips and raisins.

 2. Bake 375 degrees, paper lined or greased muffin tins, 20-25 minutes. Makes approximately 2 dozen.

Thursday, January 21, 2010

Sweet and Sour Chicken in the Crockpot- Weight Watchers Recipe!

My husband makes fun of me because I love Thai and Chinese food, but whenever we go out to those restaurants I order the same thing: Sweet and Sour Chicken. Why change it up if you know when you get that you'll love it? So I went searching on the internet for a good sweet and sour recipe that we would both love. He is a fan of curry, so when I found this Weight Watchers Sweet and Sour Chicken Curry recipe I knew it was meant to be, especially when I saw that I could make it in my beloved crockpot! It is only 6 points on the Weight Watchers diet; however, I added pineapple and served it over rice, so I am pretty sure my recipe is much higher in points!
Sweet and Sour Chicken Curry
Adapted from Weight Watchers.com
1 lb. chicken breast, cut into 1 inch slices
1 large green pepper ( I used 2)
1 large Vandila onion
1-14.5 oz stewed tomatoes
1/2 cup mango chutney
1/4 cup water
2 tbls. cornstarch
1.5 tsp. curry powder
** I also added pineapple slices and served this over rice**

1. Place cut up chicken breasts into a crockpot, add the green pepper, onion, and top with stewed tomatoes.

2. Mix the chutney, water, cornstarch, and curry powder together in a bowl on the side. Once it is throughly mixed, pour over the top of the ingredients in the crockpot.

3. Let it cook on low for 4.5 hours in your crockpot. I made mine the night before and let it cook for 10 hours and then on warm until I got home from work and was ready for dinner; however, it did not need to cook that long, so I'd say if you can do it in like 5-6 hours you will be good to go!

Wednesday, January 20, 2010

Greek Burger and a Greek Salad on the Side

My husband and I used to have a slight obsession with the Park Tavern's Mediterranean burger, theirs has sour cream and other ingredients, but we decided to try and make our own version and it turned out great! I know we didn't have as many ingredients as they put on theirs, but I must say it was tasty! Normally we will take the ingredients and put them in the food processor with the ground beef and make it all blended together, but we had burger patties from Omaha Steaks, thanks Patti, so we decided  to try it this way, I must say, I really liked it. Unlike our other attempts, the burger stayed in one piece and the same bold flavor was there. We ran out of banana peppers, otherwise I would have put more on top for extra flavor. I also made a greek salad to accompany our burger, you can never go wrong with a greek salad. I know the ingredients, but always end up trying a different recipe for the dressing and found this recipe at Janet is Hungry's blog, I enjoyed her recipe for the dressing, it was delicious!


Greek Burger 
Loosely based off the Mediterranean  burger from the Park Tavern
Burger Patties
Feta cheese
kalamata olives
Banana Peppers
Italian seasoning
**Put all of these ingredients into a food processor and grind up until it is a paste. Then spread over your burgers, yum!
Greek Salad
Adapted from Janet is Hungry
1 large head Romaine Lettuce
1/2 half red onion, sliced
1 English Cucumber, sliced
1 cup Kalamata olives
1 cup Greek Feta, crumbled

**I added chopped tomatoes as well for extra taste and a dash or two of dill.**

Dressing:
1/2 cup olive oil
3 tbsp red wine vinegar
1 tbsp fresh lemon juice
1 tsp dried oregano
1/2 tsp salt
freshly ground pepper

1. Place lettuce in a large bowl.

2. Mix dressing ingredients in a bottle and give it a good shake.

3. Toss lettuce with about 1/2 the dressing.

4. Place remaining salad ingredients on top of lettuce, and drizzle with some more dressing.

Tuesday, January 19, 2010

Grilled and Stuffed Portobello Mushrooms with Gorgonzola and Grilled Asparagas

My friend Nikki suggested I try this recipe, her family made it for Christmas. I am sure glad she did, because it is delicious! I was looking forward to making it all day long and came home expecting there to be a lot to this recipe, but in all actuality, it was super easy and quick. Much less work than expected and the taste was to die for! I have to admit, I am a bit frugal when it comes to grocery shopping and usually hit up at least two different stores each week in order to get the best deal, ask me what something costs at Alidi, Trader Joes, and Super Target and sadly I would know! What I am trying to get at is that the recipe called for 6 Portobello mushrooms, but at $3.50 for two, I only dropped for four, especially since it is just Pat and I eating them. That will give us enough for dinner tonight and lunch tomorrow, perfect! However, I would definitely splurge for 6 in the future and make this for guests, especially because it seems like a lot more work than it is.  

You can never go wrong with asparagus with a little olive oil, salt, and pepper, and my favorite, a touch of lemon juice. Although I called them grilled asparagus, we weren't able to get the grill cover off our grill (it was frozen to the grill) so I put them in the oven at 350 for about 15 minutes. When they were done, I put some freshly grated romano (Parmesan would work too) on top and let it melt before serving. YUM! I also grilled the mushrooms on the stovetop and then broiled them in the oven on high ( a little to long if you notice the browning on my cheese, oops) until the stuffing was warmed through and the cheese had melted. I haven't had them on the grill, but they were tasty on the stovetop!

Grilled and Stuffed Portobello Mushrooms with Gorgonzola                       Recipe courtesy Giada De Laurentiis 

Serves: 6 servings
Ingredients
  • 2 tablespoons olive oil, plus 1/4 cup
  • 12 ounces turkey sausage, casings removed
  • 2 cloves garlic, minced
  • 1/2 cup mascarpone cheese, at room temperature
  • 2 tablespoons fresh thyme
  • 2 tablespoons fresh oregano
  • 3/4 cup plain breadcrumbs
  • 1 cup (4 ounces) Gorgonzola, crumbled
  • 1/2 teaspoon kosher salt, plus extra for seasoning
  • 1/2 teaspoon freshly ground black pepper, plus extra for seasoning
  • 6 large portobello mushrooms, stems removed

Directions

1. Place a grill pan over medium-high heat or preheat a gas or charcoal grill.
In a large skillet, heat 2 tablespoons of oil over medium-high heat. Add the turkey sausage and cook, stirring frequently, until cooked through, about 5 minutes. Add the garlic and cook for 1 minute. Remove the pan from the heat.

2.Stir in the mascarpone cheese. Add the thyme, oregano, bread crumbs, 1/2 of the Gorgonzola, 1/2 teaspoon salt and 1/2 teaspoon pepper. Stir until all ingredients are combined.

3. Brush the mushrooms on both sides with the remaining oil and season with salt and pepper. Grill the mushrooms, stem side down, for 3 minutes. Turn the mushrooms over and grill for 2 minutes until tender. Fill each mushroom with the sausage mixture and top with the remaining Gorgonzola.

4. Return the mushrooms to the grill and cook until the stuffing is warmed through and the cheese starts to melt, about 5 to 7 minutes.

Cook's Note: The assembled mushrooms can also be placed on a baking sheet and cooked under a preheated broiler until warmed through.

Monday, January 18, 2010

Homemade Pita Bread and Hummus

So I didn't have enough time to make the homemade pita bread, but I did make homemade hummus and it was yummy! I posted both recipes below in case you get ambitious and decide to make both! Homemade hummus is super easy and much cheaper than buying it premade at the grocery store. I got the pita bread recipe from HERE and I just threw together what we had on hand for the hummus. 


Hummus Ingredients
1 can of drained carbonzo beans
1 jar of roasted red peppers
2 cloves of garlic
a little Olive Oil
Red Pepper flakes (optional)


1. Mix all of the ingredients in a food processor until everything has been fully mixed and mashed.
2. Serve with pita bread, pita chips, veggies, etc.

Pita Bread Recipe Ingredients

You will need:
  • 1 package of yeast
  • 1 1/2 cup of warm water
  • 3 cups of flour
  • 1 1/4 teaspoon of salt
  • 1 teaspoon of granulated sugar

Prepare the Pita Dough

First we need to activate the yeast. Dissolve the yeast in 1/2 cup of warm water. Add sugar and lightly stir until dissolved. Let it sit for 10-15 minutes until the water is frothy. Make a depression in your bowl of flour and pour in your yeast mixture.

Slowly add 1 cup of warm water and stir with a wooden spoon until the mixture is combined. Flour your working surface, place the dough and knead it for 10-15 minutes until it is elastic. Coat the large bowl with olive oil and place your kneaded dough. Turn the dough so it is also coated in oil. Place the bowl in a warm place to sit for 1 hour until the dough is doubled in size.

Shape the Pita Dough

Flour your working surface and roll out your dough in a shape of a rope. Cut the dough into 10-12 small pieces. Roll out each ball of dough with a floured rolling pin into circles about 5-6 inches and 1/4 inches thick.

Bake the Pita Bread

Preheat the oven to 500 degrees F and place your rack at the bottom of the oven. Bake each circle for 4 minutes. When the bread puffs up, turn over and bake for 2 minutes on the other side. When the pita browns on the second side, remove the pita with a spatula and add additional for baking.

You can store pita bread in a pantry or bread box for a week and up to a month in a freezer

Not Your Average Taco Salad-Thanks to Azteca!

You can never go wrong with a taco salad and thanks to Azteca, your taco salad can be even easier! We found these taco salad shells at the grocery store a few years ago and can be found buying them weekly! They are super easy and much better than simple tortilla chips, it adds a whole new dimension to your meal! I know this isn't a recipe worth sharing, as everyone knows how to make tacos and taco salads, but I thought I'd share this neat product with you in case you haven't discovered it for yourself, you can get them at most grocery stores. Enjoy!

You can never go wrong with a taco salad and thanks to Azteca, your taco salad can be even easier! We found these taco salad shells at the grocery store a few years ago and can be found buying them weekly! They are super easy and much better than simple tortilla chips, it adds a whole new dimension to your meal! I know this isn't a recipe worth sharing, as everyone knows how to make tacos and taco salads, but I thought I'd share this neat product with you in case you haven't discovered it for yourself, you can get them at most grocery stores. Enjoy!

Sunday, January 17, 2010

Butternut Squash Ravioli with Homemade Sauce-Yum!

My husband was nice enough to make me lunch today, on commercial breaks of the Vikings game of course! We bought premade butternut squash ravioli at the grocery store awhile ago and had it in the freezer to make for a meal one night. However, we didn't know what kind of sauce to use with it, we thought about using olive oil, but my husband wanted something with more flavor. Thankfully he did, because he came up with an amazing combination that was delicious! He searched online, got a few ideas, and then improvised the rest. I don't have exact measurements for the sauce, when I asked him he said, "A little bit of this, a little bit of that." I am a complete dork and when he handed me my plate, I smelled it and tried to guess what was in it, and surprisingly I got all of the ingredients right! I think I am ready for Top Chef now, only kidding, but I can always dream. The picture does not do this justice, I was ready to dig in and eat it right away since it smelled so good and then realized I should take a picture for the blog!

Sauce Ingredients:
Heavy Cream
Cinnamon
Nutmeg
Pumpkin Pie Spice
Salt
Pepper
Butter

White Chicken Chili

This recipe is to be done on the stove top; however, I changed it so it can be made in a crock pot and cook overnight or while you are at work. I got this recipe from my coworker, Mary, thank you! It is delicious and isn't too bad for you either. It is easy and the best part about a crock pot is it cooks all day and you come home to a house filled with the yummy smell of dinner. I made this for lunch this weekend and everyone seemed to really enjoy it, but I forgot to take a picture! It will have to be a surprise for you when you make it!

White Chicken Chili
From My Coworker Mary

1-1lb white beans, rinsed (navy beans)
6 cups chicken broth
2 onions, chopped
1 T. oil
6-8 garlic gloves, chopped
7 oz. green chiles
2-3 t. ground cumin
2 t. dried oregano leaves
1 t. cayenne pepper
4 c. cooked and diced chicken
1 c. sour cream
3 c. shredded Monterey Jack cheese (note about 8oz. block of cheese= 3 c. shredded)
Chopped green onions, cilantro, and tomatoes to serve if desired

1. Put your crockpot on high and put the white beans and 6 cups of chicken broth in and stir together. Let it sit on high for at least two hours. Do not add anything else before the two hours are up.

2. After two hours, saute onions in oil on the stove-top until golden brown.

3. Add the onions, garlic, green chilies, cumin, oregano, cayenne pepper, and chicken to bean mixture in the crock pot.

4. Let this sit in the crock pot on high for 30 minutes.

5. After 30 minutes, add sour cream and Monterey Jack cheese, stir in until the cheese melts.

6. Put the cover on and let cook on low overnight or for the day.

7. If it seems to be too runny, about an hour before you serve it, take the cover off the crock pot and let the soup evaporate a little until you reach the desired thickness. Recover.

8. Garnish with cilantro, green onions, sour cream, or chopped tomatoes if desired.

Thursday, January 14, 2010

Emeril's Calzones with an added Twist!

These calzones are the best and are oh so easy! A special thanks to my sister-in-law Carrie for introducing us to this recipe that we make at least once a week, we either have calzones or pizza! I take this recipe from Emeril and add a few extra ingredients to the crust and whatever toppings and/or fillings we have on hand and make a tasty calzone or pizza crust! You can add whatever ingredients you'd like to personalize your calzone or pizza to satisfy your taste buds. This recipe is for pizza or calzone crust, follow the directions below, but see the note at the end if you'd prefer to make calzones. Enjoy and in the words of Emeril, "Bam!"This recipe makes four large calzones, one is the size of the one in the picture.


Pizza and Calzone Recipe
From Emeril Lasgasse
1 package active dry yeast
1 cup warm water (110 degrees F.)
2 1/2 to 3 cups flour plus more if necessary
1 1/2 teaspoons salt
1 1/2 tablespoons extra-virgin olive oil 
**I also add chopped basil, sundried tomatoes, and minced garlic to my dough for extra flavor-BAM!


Pizza Toppings or Calzone Fillings Suggestions
** Please note these are just suggestions, put whatever toppings and/or fillings that you prefer. **

Mozzarella cheese
Feta cheese
Olives (whatever kind you prefer)
Tomato paste (for calzones)
pizza or tomato sauce (for pizzas)
artichokes
pepperoni or sausage
zucchini
eggplant
tomatoes
basil
sun-dried tomatoes
garlic

Directions

1. In a large bowl, combine yeast with water, olive oil, salt and stir well to proof. After 5 minutes, add half of the flour and mix well to thoroughly incorporate.
** I also add the sun-dried tomatoes, garlic, and basil at this point.**

2. Add all remaining flour except 1/2 cup and mix well with your hands. Transfer dough to a lightly floured work surface and knead dough for at least 5 and up to 7 minutes, adding enough additional flour as necessary to form a smooth and elastic dough. Dough should not be sticky. Transfer dough to a lightly oiled 2 or 3 quart bowl and turn to coat with oil. Cover with a damp towel and let rise in a warm place until doubled in size, usually at least 1 hour.

3. Preheat oven to 500 degrees F. and if you have one, place a pizza stone on the bottom rack of the oven.

FOR PIZZA CRUST: (See note below for calzones.)
Divide dough into 2 portions (for 2 (12-inch) pizzas) and form into balls.  Place on a lightly oiled baking sheet and cover with a damp towel. Let rest for 15 minutes, then transfer to a lightly floured surface, shape as desired and roll out to a thickness of 1/4-inch. Transfer dough to a pizza peel and top with toppings of choice.

Transfer to the preheated pizza stone and bake until crispy and golden brown, usually 12 to 18 minutes (depending on the toppings). Remove from the oven with a metal peel or spatula and serve immediately.

For Calzones:
Divide the dough into 4 equal portions and form into 4 balls. Place on a lightly oiled baking sheet and cover with a damp towel. Let rest for 15 minutes, then transfer to a lightly floured surface and roll out into 4 6-inch circles.

Place filling of choice in the center of one side of each circle, then fold dough over filling to meet edges of filled side. Crimp edges with a fork or your fingers, then cut a small slit in the top of the calzone to allow steam to escape while cooking.

Cook on a preheated pizza stone in a preheated 475 degree oven for about 8 to 10 minutes, or until well-browned. Remove from the oven with a metal peel or spatula and serve immediately.

Wednesday, January 13, 2010

Shortbread Cookies dipped in Chocolate--Oops there goes the Weight Watchers meal!

These cookies are to die for, seriously. I have a major sweet tooth, just ask my dentist! Even after getting two cavities filled over break, I still can't stop making and eating these cookies. We are going up to a friend's cabin this weekend so I have been baking and preparing food to share with everyone. I made these and the lemon cookies for our annual UST Christmas party and they were a big hit, our lovely friend Joe especially took a liking to them. His birthday was just last week, so I figured I'd make a few batches of cookies to bring up to the cabin for him for his birthday treat! Happy Birthday Joe! In the picture you can see both the Shortbread cookies dipped in chocolate on the right and the lemon cookies on the left. I got this recipe from Thyme for Wine and would highly recommend it!

It is important that you use the mini chocolate chips, I tried putting regular chocolate chips in the food processor to break them down and they are still just as delicious, but the dough ended up much more crumbly and I had to add a little water to get the cookies to stick together. Also note, you will only use half of the bag of mini chocolate chips. I used too many chopped up regular chips, learn from my mistake and follow the directions, even if you have to run to the store, the end result is worth it!


Mini Chocolate Chip Shortbread Cookies
From Thyme for Wine

Yield: 3 Dozen

1 C. Butter (2 Sticks)
1 C. Sifted Powdered Sugar
1 tsp. Vanilla
Pinch of Salt
2 C. Flour
6 oz. Semi-Sweet Mini Chocolate Chips

Beat butter and sugar together until light.  Beat in vanilla and salt.  Add flour and beat until mixture is blended.  Stir in chocolate chips.  I put the dough in the refrigerator for at least an hour.  Preheat the oven to 350F degrees.  Shape dough into 3/4'' balls and flatten slightly with the bottom of a glass.  Place cookies on a parchment-lined baking sheet.  Bake for about 15 minutes (cookies should be pale in color).  Remove cookies and let cool.

Chocolate Dip
3/4 C. Semi-Sweet Chocolate Chips
4 Tbsp. Butter
1 1/2 Tbsp. Cream
Pinch of Salt

Carefully melt in the microwave.  I stop it every 15 seconds and give it a good stir.  Dip 1/2 the cooled cookie in the chocolate dip.

Spaghetti Squash Marinara- Weight Watchers Recipe!

I got this recipe idea from my boss, as well as another coworker and it is delicious! It is also actually fairly good for you, only 2 points for those of you Weight Watcher fans. It is a healthy take on your classic spaghetti and marinara, only instead of noodles you use spaghetti squash. It has a wonderful flavor and you can hardly taste the squash other than a subtle sweet taste. The nice thing about this recipe is you won't need to eat a ton to feel full, I didn't even come close to cleaning my plate, but I am full, it is refreshing to feel "good full" for a change, especially after the holidays!  My picture wasn't working, so I found this one on the web instead, this picture is probably fancier than mine anyway. Thanks Mike and Kari for putting this recipe idea in my head, I am glad I tried it because it is delicious and to be honest, I think when you two described it to me I thought it sounded disgusting, but I was pleasantly surprised! YUM!

 Spaghetti Squash Marinara
Weightwatchers.com

1 medium raw spaghetti squash ( about 2 1/2 lbs)
1 t. olive oil
1 small onion
1 t. Italian Seasoning
1 tsp minced garlic
14 1/2 oz. can stewed tomatoes, cut up
1/4 cup grated Parmesan cheese

Instructions

  • Preheat oven to 350ºF.

  • Halve squash lengthwise and scoop out seeds. Place squash, cut sides down, in a large baking dish and prick skin all over with a fork. Bake until tender, 30 to 40 minutes.

  • Meanwhile, to make the sauce, heat oil in a medium skillet over medium-high heat. Add onion and garlic and sauté until tender, about 5 minutes. Stir in tomatoes and Italian seasoning; bring to a boil. Reduce heat and simmer, uncovered, stirring often, 5 minutes or until desired consistency.

  • To serve, carefully rake the stringy squash pulp from the skin with a fork, separating it into strands that look like spaghetti. Spoon sauce over squash and sprinkle with Parmesan cheese. Yields about 1 1/2 cups of squash, 1/4 cup of sauce and 1 tablespoon of cheese per serving. 

Tuesday, January 12, 2010

Hungarian Goulash-A Childhood Favorite for Pat!

My husband has started to take a liking to my blog and my love for cooking and trying new recipes. Lately I have found my inbox filled with recipes sent from "hungry, hungry husband." It is nice because that leaves less searching for me and I know I'll have a happy husband at dinnertime!  This recipe is one that his mom used to make for him, so when we were home over Christmas break, I typed up a bunch of his mom's recipes for not only this blog, but also for his sisters so they too can recreate their childhood favorites from mom! Thanks Patti! Please Note, this recipe needs to be made the night before or in the morning before work so it can cook all day in a crockpot.


Hungarian Goulash
2 lbs. stew meat 1 inch cubes
1 large onion, sliced
1 glove garlic minced
½ cup. Catsup
2 tbs. Worcestershire
1 tbs. brown sugar
2 tsp salt
2 tsp paprika
½ tsp dry mustard
1 cup water
¼ cup flour

1. Place meat in cooker. Cover with sliced onions.
2. Combine garlic, catsup, Worcestershire, sugar, salt, paprika, and mustard.
3. Stir in water. Pour over meat.
4. Cover and cook on low 9-10 hours.
5. Turn control to high.
6. Dissolve flour in cold water, stir into meat mixture
7. Cook 10-15 minutes until thickened.

Lemon Cookies with Lemon Zest

All I can say about these cookies, is YUM! They are so delicious and so refreshing that you forget you are eating cookies and not fruit! I made these around Christmas time and they were gone in no time, it is so easy to eat more than one at a time! I got the recipe from the Thyme for Wine blog, and she adapted the recipe from Pinch My Salt. You must try these, I gave some to the office administrator at our school and when I went back in an hour, he said, "The first one was good, the second one was even better!" I told you, you can't have just one!


 Lemon Sugar Cookies

(Adapted from Pinch My Salt)
Yield: 3 Dozen
2 C. Sugar, divided
Zest of 2 Lemons, divided
1 C. Butter, cubed at room temperature
2 Large Eggs, at room temperature
1 t. Vanilla
1 T. Lemon Juice
2 3/4 C. Flour
1/4 t. Salt
2 t. Cream of Tartar
1 t. Baking Soda

Prepare lemon sugar by blending 1/2 C. sugar with 1 tsp. lemon zest in a mini food processor. Pulse several times until the lemon zest is incorporated. Pour the sugar in a shallow bowl and stir with a fork (breaking up any clumps of sugar). Set aside.

For the cookie dough, stir together the flour, sugar, salt, cream of tartar, and baking soda; set aside. In a large mixing bowl, cream together butter and remaining 1 1/2 C. sugar. Add eggs one at a time, then add vanilla, lemon juice, and remaining lemon zest. Slowly add the flour mixture. Refrigerate dough for at least one hour (this is an extremely important step)! Preheat oven to 350F degrees.

To shape the cookies, I rolled the dough into a 1-inch ball and then placed it into the bowl of lemon sugar; gently roll it around. Place the ball of cookie dough on a parchment-lined cookie sheet and press down lightly with the bottom of a glass until cookie is about 1/2 inch thick. Repeat. I was able to fit 8 cookies on one baking sheet. Bake cookies for 10-12 minutes. When the cookies are done baking, I just take the whole parchment paper off the cookie sheet and let the cookies rest on the counter (still on the parchment); cool completely and ice with recipe below.


Lemon Zest Icing
1 1/2 C. Powdered Sugar
3 Tbsp. Lemon Juice, freshly squeezed
Zest of 1 Lemon
Put all ingredients in a small bowl and stir until combined. Put one teaspoon on each cookie and gently spread it around on a cooled cookie.


Monday, January 11, 2010

Turkey and Cranberry Ravioli!

I was really looking forward to trying this recipe and it didn't disappoint! The only mistake I made was that I bought cranberry sauce, not the whole-berry cranberry sauce. I think it would have had even more flavor if I had used the whole-berry sauce. However, I added craisins to add even more flavor. This is a great recipe that would work well for a dinner party of some sort or when you are having company over. It is so flavorful and very filling. Chris came over to watch football tonight, so I made this for Pat and Chris, normally I'd worry about not having enough, but they each ate one plateful and were very full! They said it was delicious and oh so filling! Thanks for being my guinea pigs guys! This recipe is a must try.
Turkey and Cranberry Ravioli
Serves 6-8 people
From Everyday Pasta by Giada De Laurentis
1 lb. ground turkey, preferably dark meat (I used white)
1/2 cup whole-berry cranberry sauce
1/2 cup freshly grated Romano cheese
1/4 cup bread crumbs
1/4 cup chopped fresh flat leaf parsley
2 eggs
1 t. salt
1 t. freshly ground black pepper
80 small square wonton wrappers

Gravy
3/4 cup (1 1/2 sticks) unsalted butter
4 shallots, chopped
1/4 cup all purpose flour
3 cups reduced-sodium chicken broth
1/2 cup heavy cream
1/2 cup grated Romano cheese, plus more for serving
1/4 cup finely chopped fresh flat-leaf parsley
1 t. salt
1 t. freshly ground black pepper

1. To make ravioli, stir together the turkey, cranberry sauce, cheese, bread crumbs, parsley, eggs, salt, and pepper in medium bowl. Place 10 wonton wrappers on a work surface. Brush lightly with water using a pastry brush. Place 1 T. of turkey mixture on each of the wonton wrappers. Top each with another wonton wrapper. Push out any air bubbles, then press the edges tightly to seal. Repeat with the remaining filling and wrappers, forming 10 ravioli at a time.

2. To make the gravy: in a medium, heavy skillet, heat the butter over medium heat. Add the shallots and cook until tender, about 5 minutes. Add the flour and stir until cooked, about 1 minute. Slowly add the chicken broth, stirring quickly to avoid lumps. Add the cream, parley, salt, and pepper and cook, without boiling, for 2 minutes, stirring often.

3. Meanwhile, bring a large pot of salted water to a boil over high heat. Add the ravioli and cook until tender but still firm to the bite and the turkey is cooked, stirring occasionally, about 3 minutes. Drain the ravioli into the gravy and stir to coat. Serve immediately in individual dishes, drizzled with the remaining gravy.

Saturday, January 9, 2010

What's for Dinner this Week?

At the request of my sister, I decided to post my meals for the week, as well as my grocery list. Below you'll find the ingredients for everything I am making this week, most of the ingredients you probably already have in your kitchen, so no need to get extra. I wanted to put everything down so you are prepared for the meals this week. Monday-Wednesday's recipes are new to me, I am anxious to try them out! The taco salad and calzones are favorites that we make often at our house and always have the ingredients on hand for. Although I am only cooking for two, my husband and I, I like to make enough to have leftovers for lunch the next day.

Monday: Turkey and cranberry ravioli
Tuesday: Spaghetti Squash Marinara (Weight Watchers)
Wednesday: Hungarian Goulash
Thursday: Taco Salad
Friday: Calzones (ingredients in italics are for calzones, you can add whatever ingredients you’d like)
Saturday: Leftovers (we will be at a friend's cabin, so we will have different meals up there)

I will be making a white chicken chili at some point this weekend for the cabin weekend and will blog about that recipe when we get back, it is delicious and can be made in the crockpot, even better!

Grocery List
1 lb. ground turkey
1 can whole-berry cranberry sauce
Freshly grated Romano
Bread crumbs
Fresh flat leaf parsley
Eggs
Wonton wrappers
Butter
4 Shallots
flour
3 cups reduced sodium chicken broth
heavy cream
1 medium raw spaghetti squash, (about 2 1/2 lb)
1 small onion(s), chopped
garlic
14 1/2 oz canned stewed tomatoes
Italian seasoning
grated Parmesan cheese
2 lbs. stew meat 1 inch cubes
1 large onion
Catsup
Worcestershire
brown sugar
paprika
dry mustard
Egg Noodles
ground turkey or beef
Black beans
Lettuce
Cheese
Sour cream
Salsa
active dry yeast
tomato paste
artichokes
black olives
mozzarella cheese
pepperoni or sausage

Thursday, January 7, 2010

Chicken and Wild Rice Salad with Almonds

Another yummy recipe from Cooking Light magazine. This is a new recipe and I love it! It is so light, but has so much flavor, it will leave you not feeling guilty going for seconds! A nice Minnesota salad with wild rice! Enjoy!
Dressing:
1/4 cup fig vinegar or white wine vinegar
2 t. sugar
1 t. Dijon mustard
1/4 t. salt
1 garlic clove, minced
2 T. canola oil

Remaining Ingredients:
2 cups fat-free, less sodium chicken broth
1 1/2 cups uncooked wild rice
1 T. butter
Cooking Spray
1 lb. skinless, boneless chicken breast
1/4 t. salt
1/8 t. black pepper
1 c. chopped celery
1/2 cup shredded carrots
1/3 cup dried cranberries
1/4 cup chopped almonds, toasted
2 T. minced red onion

1. Prepare dressing with a whisk, chill.

2. Combine broth, rice, and butter in a medium saucepan; bring to a boil. Cover, reduce heat, and simmer 45 minutes or until rice is tender and liquid is absorbed. Remove rice mixture from heat; cool.

3. Heat a grill pan over medium-high heat. Coat pan with cooking spray. Sprinkle chicken with 1/4 t. salt and pepper. Add chicken to pan and cook 8 minutes on each side. Cool, cut into 1/2 inch cubes.

4. Combine cooked rice, chicken, celery, carrots, cranberries, almonds, and red onion in a large bowl. Add dressing; toss gently to coat. Cover and chill. Yield 6 servings (1 1/2 cups)

Tuesday, January 5, 2010

If you love Mac and Cheese...you'll love this even more!

In honor of the season premiere of one of my guilty pleasures, The Biggest Loser, I decided to make a new recipe from Cooking Light Magazine. I might have a slight obsession with cheese, so this recipe caught my eye immediately. This is like Mac and Cheese gone slightly gourmet! My husband and I both inhaled our servings of this yummy pasta dish. Try it, I promise you won't regret it! This is one of the recipes that will be repeating itself often at our household! I just ordered a subscription to Cooking Light and renewed my Rachel Ray subscription, so much more to come from those magazines within the next year!
Two-Pepper Rigatoni and Cheese
Cooking Light Magazine
Yield: 8- 1 cup servings


5 cups uncooked rigatoni (16 oz uncooked)
2 T. butter, divided

1 cup chopped red bell pepper

3 T. all purpose flour

3 cups fat-free milk

1 cup (4oz) shredded fontina cheese
1 cup (4oz) shredded sharp cheddar cheese

1 T. finely chopped jalapeno pepper
3/4 t. salt
1/2 cup sliced green onions (I skipped this ingredient-we didn't have any, but it was still good!)
Cooking spray
2 (1 oz) slices white bread
1. Preheat oven to 375.


2. Cook pasta according to package directions, omitting salt and fat. Drain well; place in a large bowl.

3. Melt 1 T. butter in a large saucepan over medium-high heat. Add bell pepper, saute 5 minutes or until tender. Add to pasta.


4. Add flour to pan. Gradually add milk, stirring with a whisk until smooth. Bring to a boil; cook 2 minutes or until thickened, stirring constantly. Remove from heat. Add cheese, stirring until cheeses melt and mixture is smooth. Stir in jalapeno and salt. Add cheese mixture to pasta, tossing well to coat. Stir in green onions. Spoon pasta mixture into a 13X9 baking dish coated with cooking spray.

5. Place bread slices in a food processor; pulse 10 times or until coarse crumbs measure about 1 cup. Melt remaining 1 T. butter. Combine butter and breadcrumbs in a small bowl; toss until blended. Sprinkle breadcrumb mixture over pasta mixture. Bake at 375 for 15 minutes or until browned.

Monday, January 4, 2010

Carmelized Banana Loaf Cake

I feel like I am getting ahead of myself here, I am in the honeymoon stage of this blog so I find myself daydreaming about what I can cook or bake next and add to the blog. While my stomach thanks me for my persistence and excitement, I fear that in time my wallet will not! So forgive me if I start off strong with multiple recipes a week and eventually tapper off to my actual two new recipes a week resolution. I could blog every night because I do cook every night, but once I find a recipe I like, I find myself making it frequently, which probably won't interest my readers as much. We will see how it goes, but I must stick ot my two new recipes a week, so you can count on that! I do need to know that I am doing this for others too, so if you think of it, click the Follow button on the right-hand side of this screen. That way you'll get updates when I update my blog!

I don't know about you, but maybe one of my biggest weaknesses, besides candy and diet coke, is banana bread. My favorite thing to do is find a great banana bread recipe and add to it to make it my own. I usually can be found adding chocolate chips or chopped walnuts, but when I came across this recipe in Rachel Ray's Magazine (amazing by the way), I couldn't wait to try it! This is by far THE BEST BANANA BREAD I have made!


By: Silvana Nardon
From: Rachel Ray Magazine December
  • 6 Servings
  • Prep 35 min
  • Bake 55 min

Ingredients:

  • 3 to 4 large bananas
  • 3/4 cup sugar
  • 2 tablespoons unsalted butter, in 1 piece
  • 1 large egg plus 1 large egg white
  • 1 teaspoon pure vanilla extract
  • 1 cup flour
  • 1 teaspoon baking powder
  • 1 teaspoon cinnamon
  • 1/4 teaspoon salt
  • 1/2 cup vegetable oil

Don't leave the sauce behind! Be sure to serve all the gooey caramel from the baking pan.

Directions:

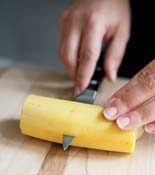
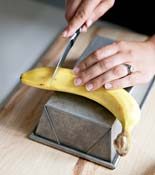
  1. Position a rack in the center of the oven and preheat to 325°. Grease a 5-by-9-inch loaf pan. Trim both ends off each of 3 bananas to fit crosswise in the pan; reserve the ends. Halve the long banana pieces lengthwise; peel and transfer to a plate.

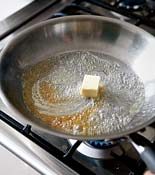
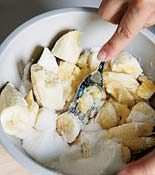
  2. In a large, heavy skillet, bring 1/4 cup sugar and 2 tablespoons water to a boil, without stirring. Cook until the water has evaporated and the mixture starts turning amber. Remove from the heat and swirl in the butter with a fork. Add the long banana pieces cut side down and cook over low heat for 1 minute; transfer to the prepared loaf pan, arranging them crosswise, cut side down. Drizzle the remaining caramel on top.

  3. In a medium bowl, mash the banana end pieces to equal 1 cup (add more banana if necessary). Mash in the remaining 1/2 cup sugar. Beat in the whole egg, egg white and vanilla.

  4. In a large bowl, whisk the flour with the baking powder, cinnamon and salt. Add the banana mixture and oil; whisk until blended. Scrape the batter over the bananas in the pan and bake until a toothpick inserted in the center comes out dry, 50 to 55 minutes. Let cool on a rack for 10 minutes; invert the cake onto a platter and let cool completely.

Photo How-To:
Amazing Snicker Cookies!

I got the idea for these cookies from Mama Nash and Company they are so delicious! They remind me of a peanut butter blossom, but with a snickers inside! Yum! These are dangerous!

Snickers Surprise Cookies

2 sticks butter 1 cup peanut butter 1 cup light brown sugar 1 cup granulated sugar 2 eggs 1 teaspoon vanilla 3 1/2 cups flour 1 teaspoon baking soda 1/2 teaspoon salt 1 to 2 packages Snickers miniatures (I ended up using about 1 1/2 packages. It will vary depending on how big you make your cookies.) 1 bag Dove chocolates Directions: 1. Combine first four ingredients 2. Add eggs and vanilla 3. Add flour, baking soda and salt 4. Cover and chill for 2-3 hours 5. Form about a tablespoon of dough around each Snickers miniature, covering completely 6. Bake on an ungreased cookie sheet at 325 for 10-12 minutes 7. Melt chocolate and drizzle over cookies